The first thing most people think of when they hear the words “project schedule” is a whole lot of charts and a whole lot of jargon. And while it’s true that many project scheduling systems involve much of the same worksheets, putting together a practical timetable for a project requires so much more. You need to consider both qualitative and quantitative data, all the while dealing with a limited budget, resource constraints, and time pressure.
Feeling overwhelmed yet? Don’t worry, though! Even if it may not appear so right now, creating an effective project schedule is well within the realm of your abilities. And to that, we’ve put together a list of valuable tips to help you get things rolling in the right direction.
But before we get down to the nitty-gritty of how to do so productively, let’s take a quick detour to understand the purpose behind project scheduling.
What is a Project Schedule?
If you haven’t already guessed, a project schedule is pretty much like a to-do list. It contains a blueprint of the tasks to be completed along with their initial due date and duration. That way, the project associates will know how long each task will take and in what order they should tackle them. The schedule is also essential for analyzing the resource availability and capacity of your team and syncing it with the project requirements to get things done quickly and efficiently.
So basically, a project schedule allows managers and staff to communicate effectively with one another about the project’s progress and vision, as well as any and all developments that occur along the way.
What’s the Point of Project Scheduling?
All projects seem simple when you draw them out in the sand or on a whiteboard. It’s when you sit down and start working that things tend to get murky, confusing, and stressful.
Let’s take the example of performance appraisal. Now in organization A, the performance management process is all over the place, filled with biases and subjective metrics. In organization B, the process flow is divided into sequential steps, and every stage has a clearly marked effect and an objective review metric. Which one do you think will lead to an efficient performance assessment? Naturally, the latter.
Organization A will lose out on their hardworking employees because they lack a streamlined game plan. Meanwhile, organization B has planned, structured, and scheduled every detail of its performance appraisal, which will undoubtedly lead to better process execution.
Forgetting about your schedule and just diving into work is a dangerous game, and if you’re still unconvinced, the following are just some of the reasons why:
- The project scheduling process will give you a better idea of precisely what’s required of you as a project manager and what the ripple effects of those requirements are going to be on the rest of the team.
- When you’re tracking the progress of your projects in an organized fashion, you’re giving the entire team a sense of what to expect in the future. That way, there are no surprises or unexpected delays to deal with.
- Effective scheduling also lets you catch issues early. For example, alerting clients of a setback and allowing them to make changes to the proposed budget or timeline.
How to Create an Effective Project Schedule?
Now that you know the basics of project scheduling, let’s get right to the meat of things. Here are the steps involved in creating an effective project schedule:
Step #1 – Prepare your schedule management strategy.
Establishing the ground rules of your project schedule, such as procedures, policies, and documentation builds the framework upon which you will develop your project. Additionally, it’s always a good idea to have contingency plans in place—after all, nobody’s perfect. When you have a plan for every eventuality, it’s much easier to keep every step moving forward. While ensuring that everything will be ready on time.
Step #2 – Define your project’s activities.

To ensure that each phase of your project runs in sync with what you will produce, you need to map out the project activities required at each stage. Sometimes this step might be as simple as a list of tasks, but other times it might include a chart or two with sub-tasks that outline what you’re building.
At this point in the project scheduling process, it’s important to know how to divvy up the project’s workload. The PMI-proposed 8-80 rule comes in handy here. According to the 8-80 rule, work packages must be chunks of work that can be done in 8 hours (1 day) to 80 hours (10 days). If you find that a task will take less than eight hours, group it with similar tasks. Likewise, charges that exceed the 80-hour threshold should be broken down further into subtasks.
Step #3 – Work out dependencies
Once you have all the project activities listed, think through each one carefully to identify dependencies. This means deciding which tasks rely on others to be completed. It’s important to correctly identify these dependencies so that your project has a stable and coherent direction. This will take some time and a lot of brainstorming discussions, but keep at it. You’ll greatly help the scheduling process by doing so.
Step #4 – Create a hierarchy of tasks.
Once you’ve completed your activity dependency list, the next step is to sequence all project activities. This stage allows you to see projects in a timeline format to plan for efficiency throughout. At this point, you’re not assigning any hours to the tasks. Instead the goal is to figure out what order they should be done to ensure a smooth workflow. You can keep the time spans for each activity undefined, or aim for a rough estimate.
Tip: This step is easy to achieve in Ganttic using Unassigned tasks. These are the tasks created in the work-breakdown structure (WBS), but left without any resources. Once you’re ready to put plans into action drag these tasks to any available resource. Easy peasy!
Step #5 – Estimate the required resources.
Each activity in your project will require resources. It’s important to consider both the obvious (personnel, subcontractor outlay) and less-obvious (tools, equipment, workspaces). Keep in mind in both instances the demands that may be put on your project’s budget. Less sometimes is more!
Step #6 – Calculate the duration.
Estimates can get tricky. Underestimating will put you behind schedule and may even upset your client. While overestimating will cause inefficiency and time wasted waiting for antecedent tasks to be completed.
The best way to wade through the estimation procedure is to rely on historical data. Then apply a slight percentage increase or decrease to account for rare factors in your project’s scope. But if it’s your first time making such an estimate, looking to the past isn’t an option. Instead, try figuring out how long similar tasks took for other companies who have gone through the same project process.
Or even better, check out 4 different ways you can estimate task duration here.
Step #7 – Start scheduling.
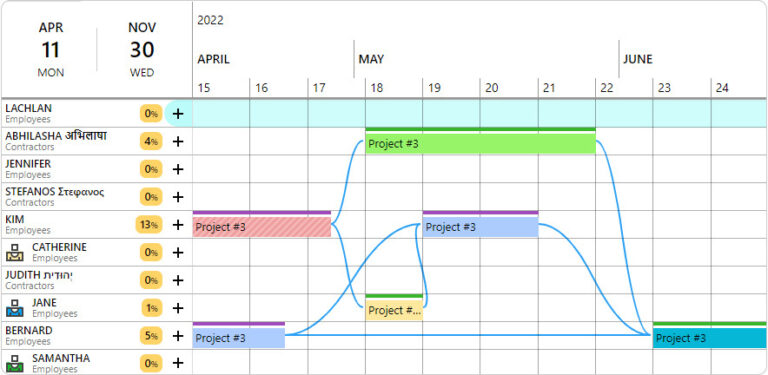
Now that you know all about the activities required to complete your project, it’s time to schedule them out. Delve into each activity, and take all the relevant details you’ve gathered from your research — the duration and resource requirements of each activity, their dependencies and their proper sequence — and plug them into your project scheduling software.
Failing to Plan is Planning to Fail.
The difference between success and failure can often be found in the details. Which is why the importance of a project schedule cannot be emphasized enough. If you don’t know how to implement one, then you might find your business sinking before it gets off the ground.
But contrary to popular opinion, creating the perfect project schedule doesn’t have to take up a lot of time and energy. With Ganttic it’s easy to create a timeline of projects, assign resources to tasks, indicate task dependencies and more. It’s a visual project resource planner that’s easy to share amongst your team members. Book a free demo to learn more. Or sign up to see for yourself.